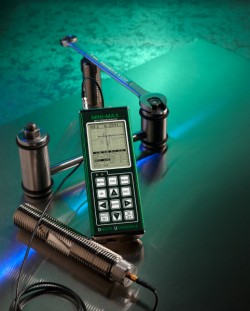
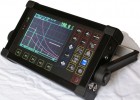
The MINI-MAX Ultrasonic Bolt Tension Monitor defines the state of the art in the measurement of the actual elongation produced by tightening a threaded fastener. MINI-MAX can measure the elongation very accurately in fasteners of virtually any material from 1/2 inch to 4 feet in length.

Features |
|---|
|
SPECIFICATIONS
Physical
-
Size:
Width (2.5in/63.5 mm)
Height (6.5 in/165 mm)
Depth (1.24 in/31.5 mm) -
Weight:
13.5 ounces (with batteries). -
Keyboard:
Membrane switch pad with
twelve tactile keys. -
Operating Temperature:
14 to 140F (-10C to 60C) -
Case:
Extruded aluminum body with nickel-plated aluminum end caps (gasket sealed). -
Data Output:
Bi-directional RS232 serial port. Windows® PC interface software. -
Display:
1/8in VGA grayscale display (240 x 160 pixels). Viewable area 2.4 x 1.8in (62 x 45.7mm). EL backlit (on/off/auto).
Ultrasonic Specifications Measurement
-
Modes:
Pulse-Echo (standard)
Pulse-Echo w/Gate (fine adjust) -
Pulser:
Square wave pulser with adjustable pulse width (spike, thin, wide). -
Receiver:
Manual or Auto Set gain control with 40dB range. -
Timing:
10 bit 250 MHz digitizer. -
Warranty:
2 year limited
Power Source
- Three 1.5V alkaline or
- 1.2V NiCad AA cells.
- Typically operates for 150 hours on alkaline and 100 hours on NiCad (charger not included.)
- Auto power off if idle 5 min.
- Battery status icon.
Measuring
- Range: From 1″ to 96″ (25.4mm to 244cm) bolts.
- Time – Nanoseconds.
- Elongation – Change in length (inches/millimeters).
- Load – Force load applied (pounds kIP or kN Kilonewtons).
- Stress – Force for unit area stress applied (pounds kPSI or megapascals MPa).
- Strain % – percentage strain applied (inches per inch or millimeters per millimeter)
-
Resolution:
+/- .00001 inches (0.0001 mm) -
Velocity Range:
.0492 to .3936 in/ms
1250 to 9999 meters/sec - Fixed, Single, and Two point zero calibration options.
- Select bolt material types from a preset or custom list.
-
Units:
English & Metric / Fahrenheit & Centigrade.
Display
- A-Scan – Rectified +/- (half wave view), or RF (full waveform view).
-
Large Digits – Display and toggle between nanoseconds, elongation, load, stress, and strain.
Digit Height: 0.400 in (10mm). -
Limits Bar(alarm limits) –
Set Hi & Lo alarm limits for displaying an acceptable tolerance range. - Repeatability Bar Graph – Bar graph indicates stability of measurement
Data Logger (Internal)
- Total of 8,000 readings, multiple bolt groups. Stores both waveform views, nanoseconds, elongation, load, stress, and strain for each reading.
Memory
-
16 megabit non-volatile ram.
Transducer
Transducer Types:
- Single Element (1 to 10 MHz & 1/8″ to 1″diameters).
-
Locking quick disconnect
“00” LEMO connectors. - Standard 10 foot cable.
- Custom transducers and cable lengths available on request.
- Temperature probe for automatic temperature compensation.
Features:
-
Setups:
64 custom user defined setups. Factory setups can also be edited by the user. -
Gate:
Gate used to fine adjust where the detection point occurs. -
Alarm Limits:
Set hi and lo tolerances with audible beeper, viewable scan bar, and visual LEDs. -
Auto Set:
Locates the detection signal, optimizes the gain setting, and adjusts the overall display to show the waveform and detection point automatically. -
Field Calibration:
Vector & linear regression.
Certification
Factory calibration traceable to national standards.


.jpg&w=140&h=100)
